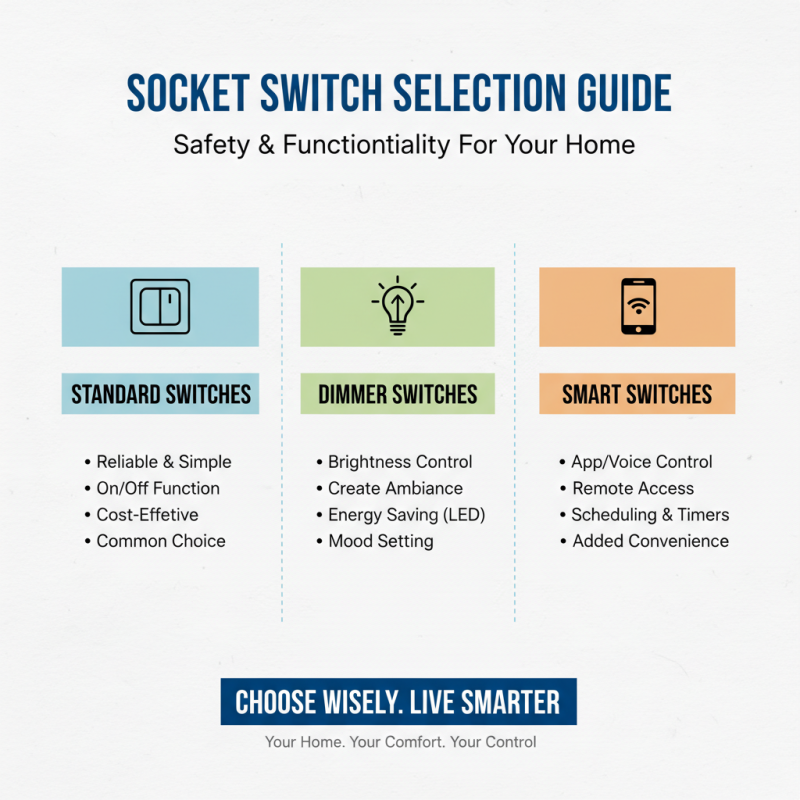
Upgrading your home can be both exciting and challenging. Installing a Single Socket Switch is a practical task that can enhance functionality. This simple installation allows you to control lights or devices with ease. It’s a small change but can significantly impact daily life.
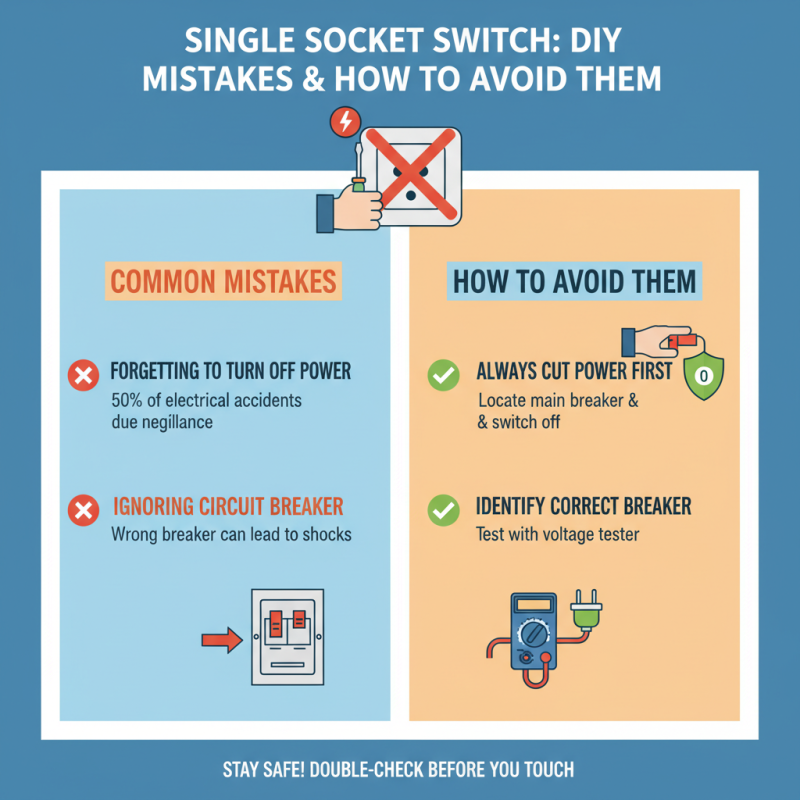
Before starting, gather necessary tools like a screwdriver and wire connectors. You might face some unexpected issues. For example, understanding the wiring can be tricky, and you may need to consult a manual. Mistakes can happen when you’re focused on finishing quickly. It’s important to take your time and ensure safety.
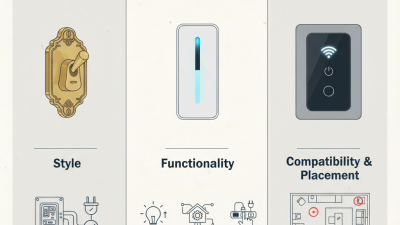
A Single Socket Switch is not just about convenience. It reflects how we interact with our spaces daily. Think about where you need it most. Maybe by the bedside for reading lights or in the living room for ambiance. Visualizing its placement makes the switch installation more thoughtful and satisfying.
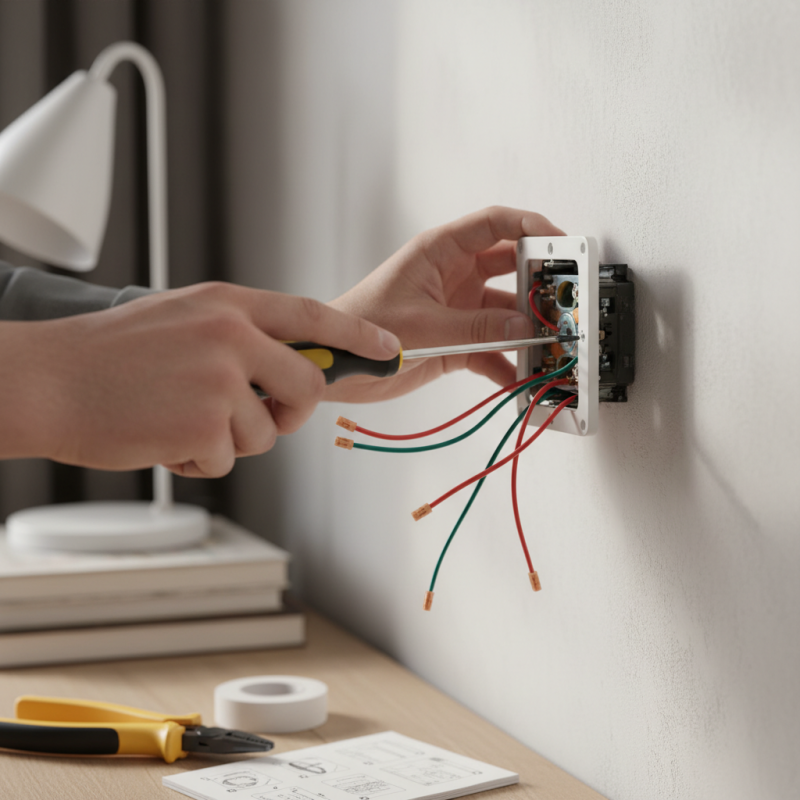
Understanding home wiring is essential for a successful electrical project. A basic circuit consists of a power source, wires, a switch, and a load. The power source can be your home's main electrical panel. Wires are the pathways for electricity.
When installing a socket switch, safety is crucial. Always turn off power at the breaker. Use a voltage tester to ensure the wires are not live. Choose the right gauge wire for your circuit to prevent overheating.
Tips: Label each wire during installation. It helps in case of future repairs. Keep your workspace tidy. Clutter can cause accidents.
It's easy to overlook small details, like securing connections. Loose connections can lead to malfunction. Pay attention to the load rating of your switch. An undersized switch may pose a fire risk. Remember to double-check your work before restoring power.
When selecting a socket switch, it's crucial to understand the types and ratings available. The right switch can enhance both safety and functionality in your home. There are various types to consider: standard, dimmer, and smart switches. Each has unique benefits. Standard switches are reliable and straightforward, making them a popular choice. Dimmers, on the other hand, allow you to control brightness, which can create ambiance. Smart switches offer added convenience, enabling control from your phone or through voice commands.
It's also essential to pay attention to the ratings. Socket switches have voltage and amperage ratings to ensure compatibility with your home's electrical system. A mismatch can lead to hazards. Usually, most household switches operate on 120V or 240V. Amperage ratings typically range from 10A to 20A. Always check your appliances' requirements before making a choice. You might find that a certain switch looks great but isn’t suited for your needs.
Installation can also be tricky. If you're unsure about the process, consider seeking help. Sometimes, doing it yourself can lead to mistakes, such as improper wiring. That's the last thing you want for safety. Reflecting on your choices can lead to a better outcome. Choosing the right socket switch is a blend of style, safety, and practicality.
When upgrading your home, safety comes first. Installing a single socket switch requires specific tools and equipment. Essential tools include a screwdriver, wire stripper, and voltage tester. These tools help ensure that connections are made safely.
Don’t forget your safety gear. Wearing gloves can protect your hands from any sharp edges. Safety glasses safeguard your eyes from dust and debris. It’s easy to forget these details, but they are crucial. Check that the power is off before starting the installation. A voltage tester is handy for this.
Often, people rush through these tasks, overlooking safety steps. It’s important to review each phase thoroughly. One mistake could cause a hazard. Each tool serves a purpose, and each safety measure is essential. Take your time. Reassess your approach if needed. Being diligent can lead to a successful installation.
| Tool/Equipment | Purpose | Safety Instructions |
|---|---|---|
| Screwdriver Set | Used to remove and tighten screws | Ensure the power is off before starting work |
| Wire Strippers | To strip insulation from wires | Wear safety goggles to protect eyes |
| Voltage Tester | To check if wires are live | Always test the voltage before handling wires |
| Insulated Gloves | To protect hands from electric shock | Use gloves rated for electrical work |
| Electrical Tape | To secure and insulate wire connections | Ensure the connections are secure before taping |
| Labeling Markers | To label wires and their connections | Label clearly to avoid confusion later |
Installing a single socket switch can be a beneficial upgrade for your home. The process is straightforward, but attention to detail is crucial. According to industry reports, 30% of DIY electrical installations encounter issues due to lack of knowledge. Start by turning off the power at the circuit breaker. This ensures safety during installation.
Next, remove the old switch. You may find several wires connected. Take a photo for reference. Make sure to label each wire. This prevents confusion later on. Use a voltage tester to confirm no power is flowing through the wires. This step is often overlooked, leading to potential hazards.
Attach the new switch according to your earlier notes. Connect the wires securely. Ensure you follow the local electrical codes for safety. It is important to check your work before restoring power. Once everything is secured, flip the breaker back on and test the switch. If it does not work, recheck the connections. Remember, even small mistakes can lead to larger issues down the line. Reports show that inexperienced installations can increase the risk of electrical fires by 25%.
When installing a single socket switch, several common mistakes can hinder the process. Many DIY enthusiasts overlook the importance of turning off the power. Data from the Home Safety Council indicates that nearly 50% of home electrical accidents occur due to negligence in this area. Ignoring this step can lead to electric shocks or even more severe injuries. It’s crucial to always locate the correct circuit breaker.
Another frequent error is improper wiring. A report by the National Fire Protection Association mentions that faulty wiring is a leading cause of electrical fires, responsible for over 47,000 house fires annually. Ensuring that wires are stripped correctly and secured in the right places is vital for safety and functionality. Mistakes in polarity can result in short circuits or equipment damage. Use a voltage tester before making connections to confirm everything is wired correctly.
Lastly, many forget to label the wires, which can lead to confusion during future modifications. These oversights may seem minor but can contribute to bigger problems later on. Consider the long-term implications of each step. Taking time and care during installation is essential for a safe and effective upgrade that will last.