How to Choose the Right Dimmer Switch for Your Home?
Choosing the right dimmer switch for your home is essential. It influences ambiance and energy efficiency. Expert lighting designer, Sarah Mitchell, states, "A dimmer switch can transform any room." Her insight highlights the significance of selecting the right one.
Dimmer switches come in various types. Consider compatibility with your lighting fixtures. Not all dimmers work with LED bulbs, which can lead to flickering. Think about the amount of control you need. Some models offer adjustable brightness, while others provide preset levels. You may feel overwhelmed by choices.
Aesthetic and functionality matter equally. Different styles exist, from modern to vintage. Ensure the dimmer switch complements your home’s decor. Selecting the right dimmer switch requires both careful thought and a willingness to experiment. The goal is to enhance your living space. The wrong choice can detract from your home's atmosphere. Take the time to explore options. Your home deserves the best.

Understanding Dimmer Switch Types and Their Features
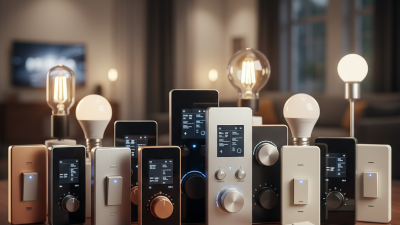
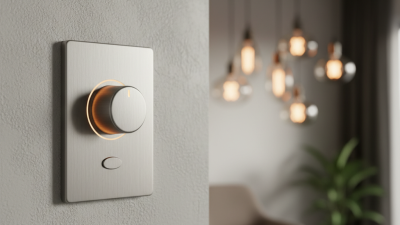
Choosing the right dimmer switch involves understanding various types and their features. One popular option is the rotary dimmer. These switches provide a classic look and are simple to operate. You can easily adjust the brightness with a turn. Another common type is the slide dimmer. It allows for fine-tuning of light levels and is user-friendly.
Wireless dimmers have gained popularity too. They can be controlled via smartphone apps or remote controls. This feature offers convenience, especially in hard-to-reach places. However, installation may require some tech-savvy.
**Tip:** Always check the wattage rating of your dimmer. Overloading a dimmer switch can lead to flickering lights or even hazards.
Consider the type of bulbs you plan to use. Not all dimmers work with LED bulbs. Using incompatible dimmers can cause issues. It's worth doing your homework to ensure compatibility.
**Tip:** Test different dimming levels to find your ideal setting. A too-bright environment can feel harsh, while very dim lighting might not be effective. Adjust until it feels just right for your space.
Comparison of Dimmer Switch Types
Assessing Your Home's Electrical Compatibility for Dimmer Switches
When selecting the right dimmer switch, assessing your home's electrical compatibility is crucial. Not all homes have the same wiring or electrical capacity. Older homes may have outdated wiring that may not support modern dimmer switches. Check the age of your home and its electrical system before making a selection.
Identify your current light fixtures and their wattage. Different types of bulbs have distinct compatibility with dimmer switches. For example, incandescent bulbs work well with most dimmers, while LED bulbs require specific types. If you're unsure, consulting an electrician can provide clarity. They can also review circuit breakers to ensure compatibility with additional loads.
You might face challenges when upgrading existing switches. Have you considered how many switches you need? Additionally, think about how many lights each dimmer will control. If the setup is complicated, reflect on simplifying the circuit or using multiple dimmers. These adjustments can enhance your lighting experience.
Choosing the Right Bulbs for Your Dimmer Switch
When choosing bulbs for your dimmer switch, consider compatibility first. Not all bulbs work well with dimmers. Incandescent bulbs are a classic choice; they dim smoothly and provide warm light. However, if you prefer energy-efficient options, look for LED or CFL bulbs designed for dimming. Check the packaging for labels indicating compatibility.
Tips: Always make a list of your lighting needs. Think about the purpose of each room. A cozy ambiance in the living room? Choose softer, warmer bulbs. For task lighting, brighter options may be better.
Remember, the dimming range of bulbs may vary. Some can only dim to a certain level before flickering. You may need to experiment with different types to find what works best for you. Dimmer switches can also age over time. Regular checks can prevent uneven lighting.
Tips: Test various brightness levels in your space. Observe how each bulb reacts with your dimmer. Consult with an electrician if unsure about wiring or compatibility. Small adjustments can lead to better functionality and comfort in your home.
How to Choose the Right Dimmer Switch for Your Home? - Choosing the Right Bulbs for Your Dimmer Switch
| Dimmer Switch Type |
Compatible Bulb Types |
Maximum Wattage |
Features |
| Standard Dimmer |
Incandescent, Halogen |
600W |
Basic functionality |
| Smart Dimmer |
LED, CFL, Incandescent |
300W |
Remote control, scheduling |
| Multi-Location Dimmer |
LED, Incandescent |
600W |
Works from multiple switches |
| Retrofit Dimmer |
LED, CFL |
150W |
Easy installation |
| Low Voltage Dimmer |
LED, Halogen |
300W |
For transformers |
Evaluating the Dimmer Switch's Design and Style
When selecting a dimmer switch, design and style play crucial roles. A well-chosen dimmer can enhance your home’s aesthetic. Various designs are available, from sleek modern looks to traditional styles. According to a recent report by the American Lighting Association, nearly 70% of homeowners agree that dimmers improve their living space.
Consider color and material. Brass, matte black, or white finishes can complement your decor. A surprising finding from a design survey indicated that 45% of homeowners prioritize style over functionality. This can lead to mismatched systems that affect your home's overall vibe. The perfect dimmer should balance function and form.
Tip: When choosing a dimmer, think about the ambiance you want to create. Soft lighting works well in bedrooms, while brighter options suit kitchens. Ensure the style aligns with your existing decor. Experimenting with different styles can be enlightening, but mismatches may occur. Engage with design experts to avoid common pitfalls.
Installation Tips for Your New Dimmer Switch
When installing a new dimmer switch, it’s essential to prioritize safety and efficiency. Before starting, turn off the power at the circuit breaker. Use a voltage tester to ensure there is no electricity running to the switch. This step is crucial to avoid potential shocks during installation. Consider the weight of the existing wiring. If it's old or brittle, it may need to be replaced. Working with outdated wiring can lead to complications later.
Carefully remove the old switch. Take note of how the wires are connected. It's wise to take photos for reference. Strip the ends of the wires if necessary. Connect them to the new dimmer according to the manufacturer’s instructions. Neat connections are key. Loose wires can cause flickering or even short circuits. Ensure the dimmer is secured in the wall box before replacing the cover plate.
Testing is the final step. Restore power and gently adjust the dimmer. Watch for any unusual signs; flickering lights may indicate incorrect installation. Remember, if something doesn’t seem right, reassess your work. Installation can seem straightforward, but small details matter significantly. Keep safety as a top priority, and don’t rush through the process.